Revisiting Intel’s 8-bit 8080 microprocessor
Last updated Jun 10, 2019 — 1718 views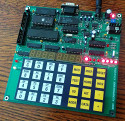 Recently I got bit by a nostalgia bug. With all the awesome power and capabilities of today’s 64-bit multi-core Intel and ARM SoCs, including seemingly unlimited processing power, it dawned on me that few of us realize what’s going on deep down at the level of the CPU chips’ internal registers. Which got me thinking about my first single board computer creation: the “8080 Abie.”
The design of my 8080 Abie SBC was inspired by MOS Technology Inc’s iconic “KIM 1” development board (pictured below), which I used as the embedded computing platform for my masters thesis project. My project’s goal was to automate the collection of weather data at my school’s NOAA weather station.
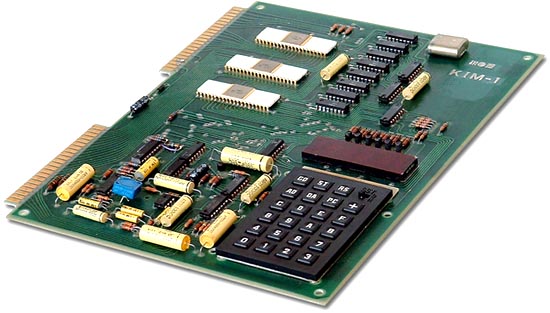
MOS Technology KIM 1
(click image to enlarge; source: oldcomputers.net)
I programmed the KIM 1 by entering hexadecimal 6502 op-codes using the keypad of its primitive user interface. One of the key challenges of the weather data collection process was converting analog weather data into digital format, which was accomplished by means of a 6502-controlled successive approximation algorithm.
Going DIY
With the KIM 1 under my belt, I decided to try my hand at creating my own microcomputer board design. For the core of my design, I chose the 8-bit Intel 8080 microprocessor, which had recently popped up at the local Radio Shack store. Like the KIM 1, my “8080 Abie” microcomputer’s user interface would be a keypad and 7-segment display.
Since I lacked the equipment to burn monitor code into a PROM, I carefully wrote the required code, mailed it off (along with a blank PROM) to a friend who had access to a PROM programmer, and awaited its return. Amazingly, the programmed PROM worked flawlessly, most likely due to my having kept the code super-simple in order to avoid errors, since I had no way to test it in advance.


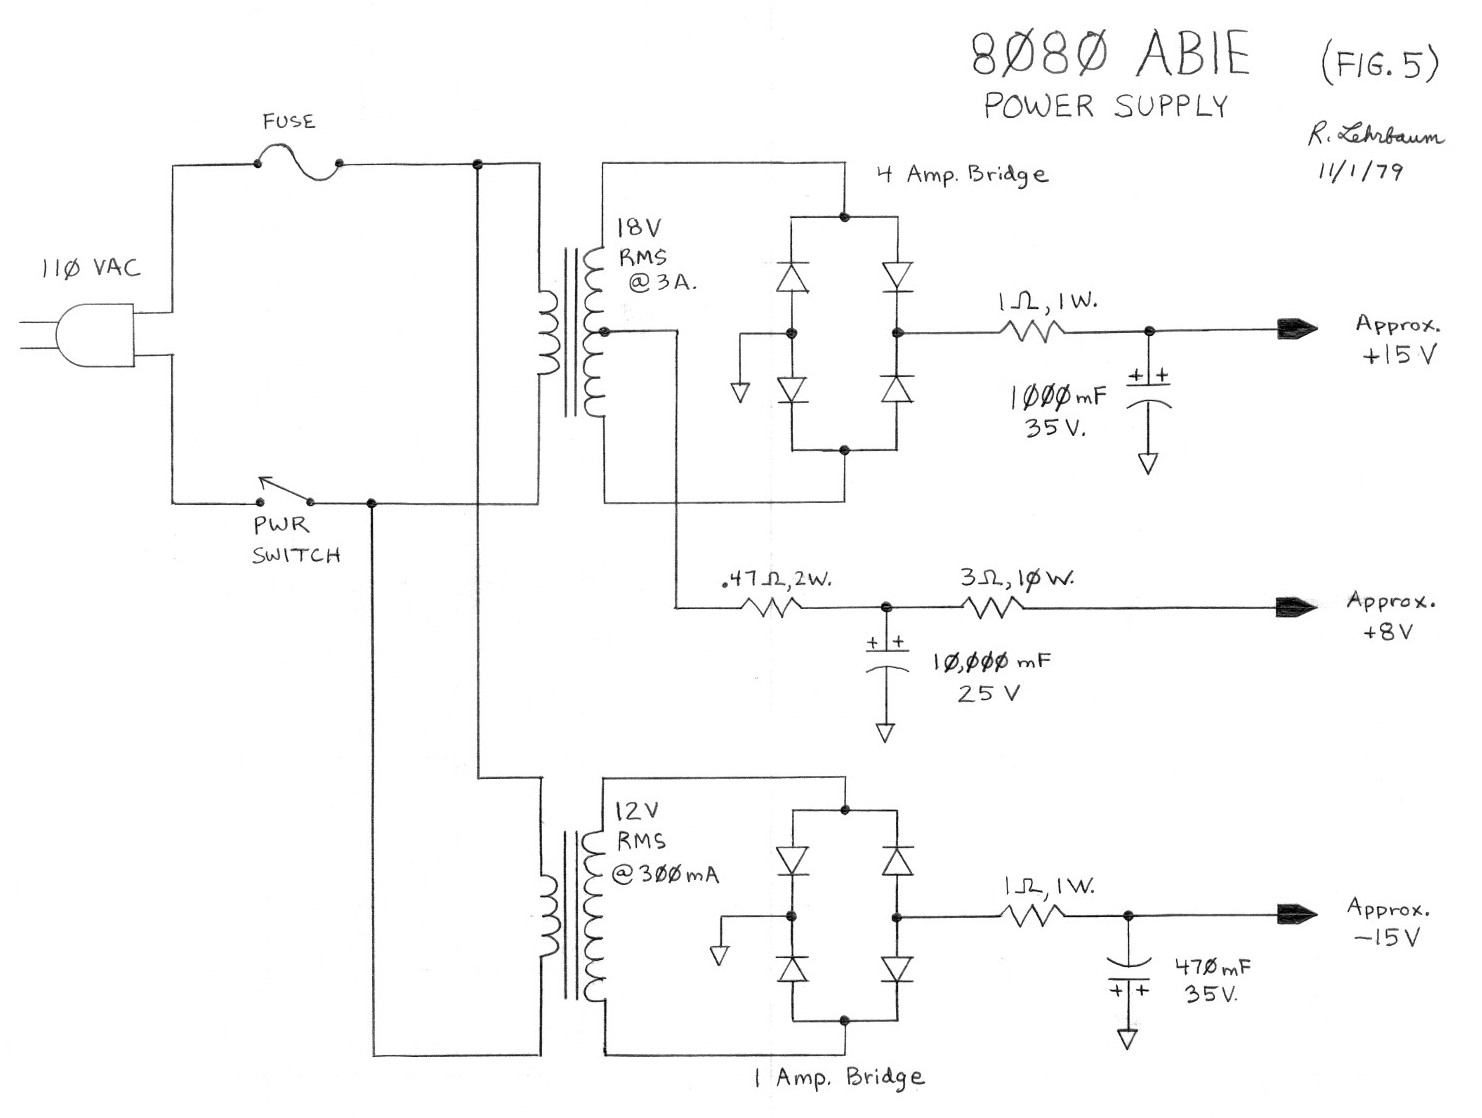
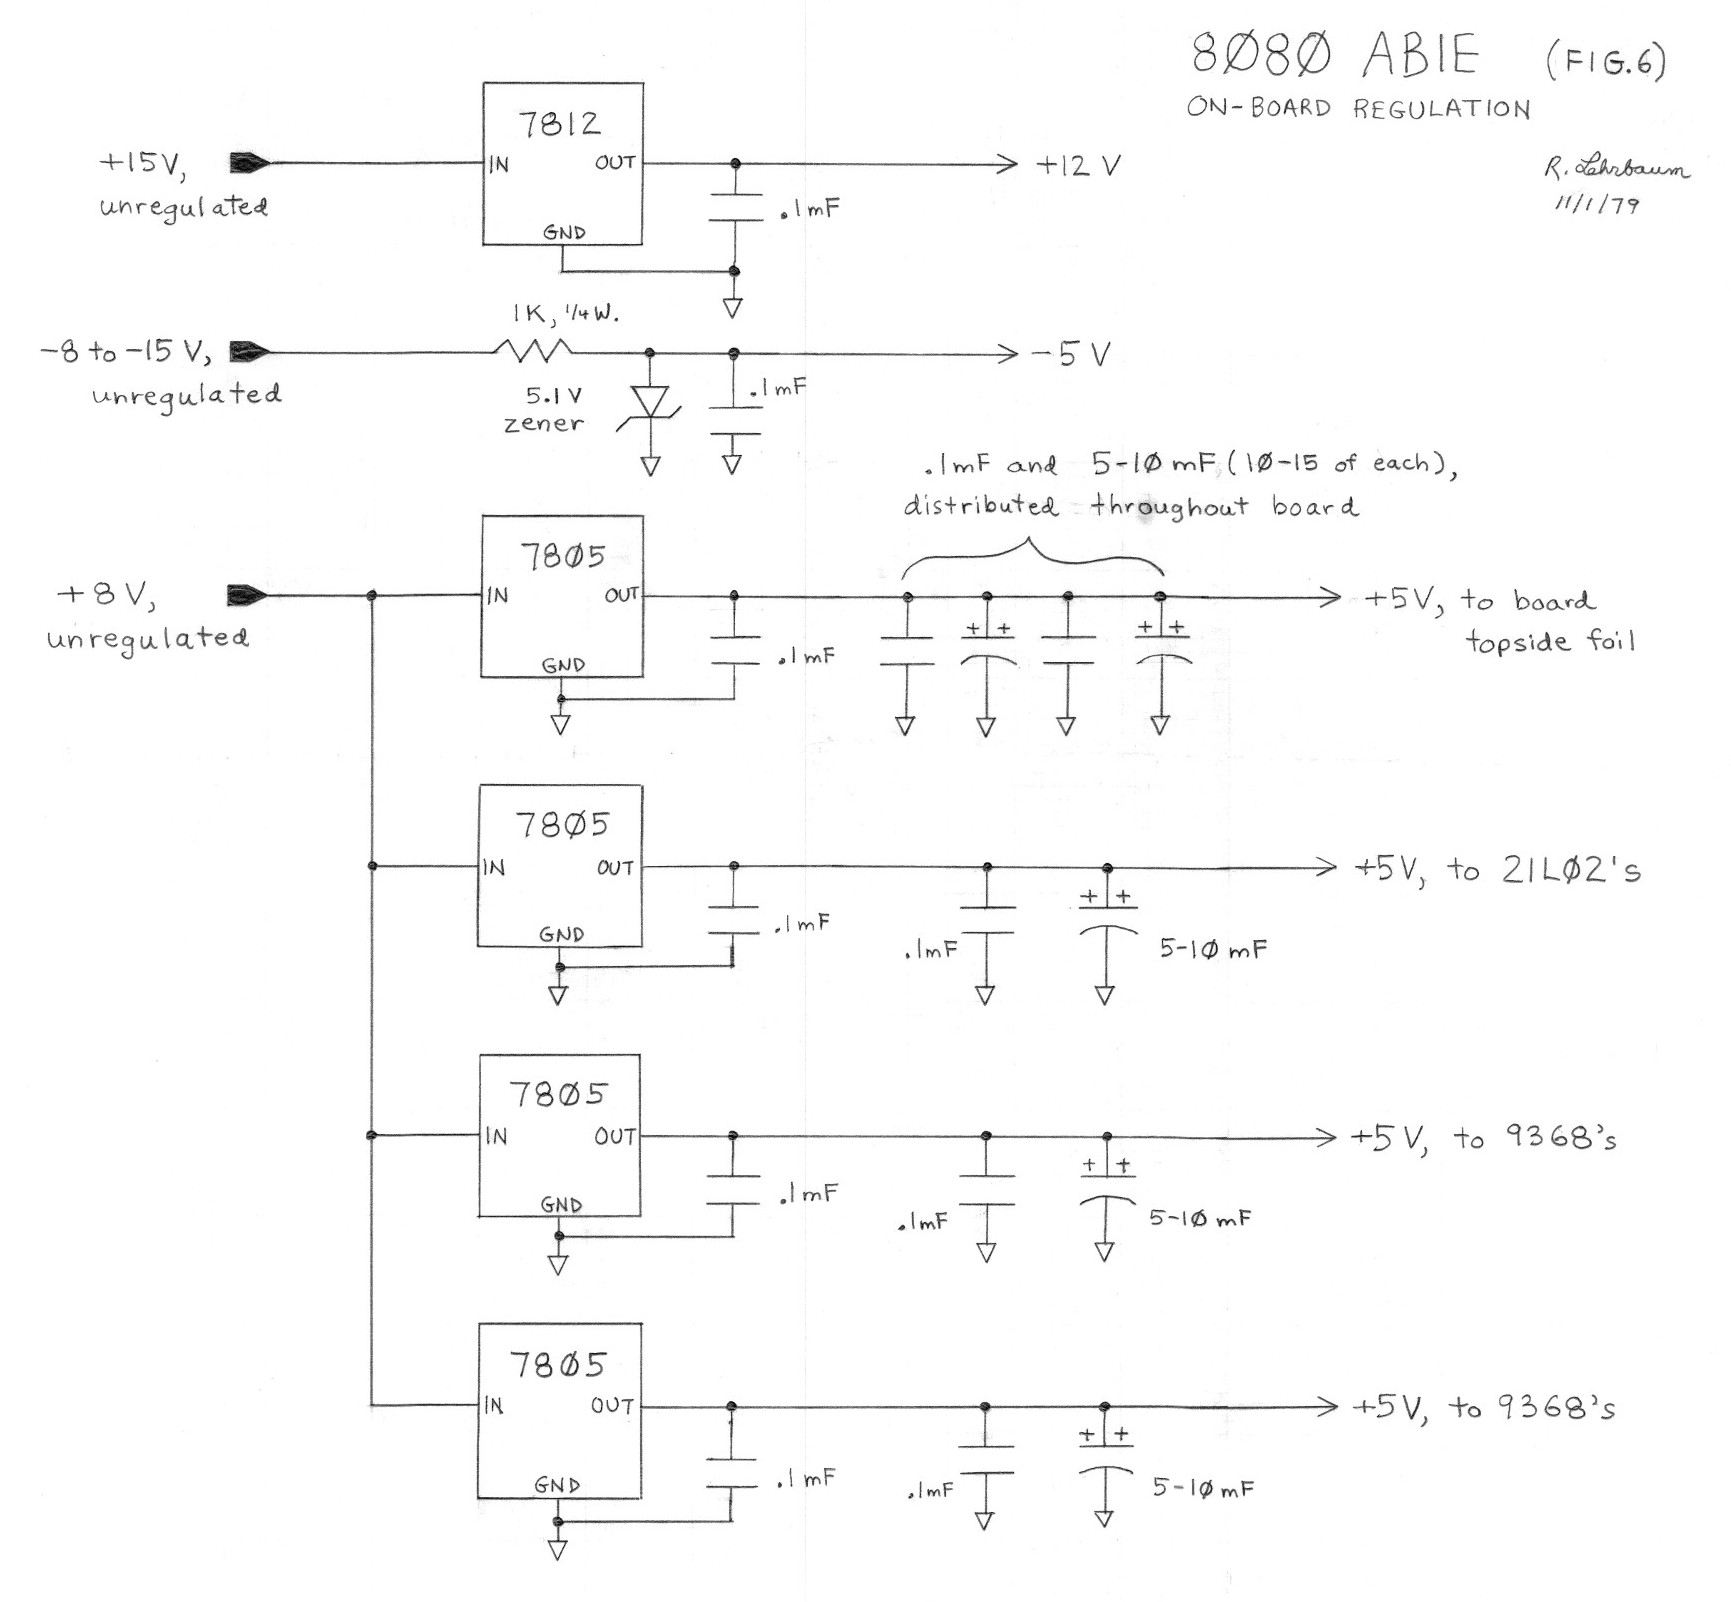
8080 Abie design schematics: CPU, memory, I/O (upper left); user interface (upper right); external power supply (lower left); on-board voltage regulation (lower right)
(click images to enlarge)
Unfortunately my 8080 Abie SBC was burnt to a crisp in a basement fire back in the mid-90s, and I don’t have any photos of it to share here. However, its schematic appears above.
A 21st-century 8080 development board
Back to my nostalgia… In thinking about the “good old days” of hand assembling 8080 code and bit-banging I/O lines on a homebrew 8080 microcomputer, I decided to see if I could locate a similarly simplistic 8080 board on which I could refresh my low-level 8080 programming skills. Googling “8080 development board” quickly turned up an interesting board that had much in common with my dearly departed 8080 Abie, albeit making use of a few more modern ICs, along with a greatly simplified power supply.
The 8080 development board I located is aptly named the “8080 Microprocessor Kit.” The kit is described in detail on the website of its developer, Wichit Sirichote, who is on the Applied Physics faculty of the King Mongkut Institute of Technology in Bangkok, Thailand. It can be purchased either as a DIY kit, or fully assembled and tested.

8080 Microprocessor Kit
(click image to enlarge)
Sirichote lists these features for his 8080 Microprocessor Kit:
- CPU — NEC 8080 CPU clocked at 2.048MHz
- Oscillator — 8224
- Bus controller — 8228 with RST 7 strobing for interrupt vector
- Memory: 32KB RAM; 32KB EPROM
- Memory and I/O decoder chip — GAL16V8D PLD
- Display — high brightness 6-digit 7-segment LED
- Keyboard — 28 keys
- RS232 serial port — software-controlled UART 2400 bps 8n1
- Debugging LED — 8-bit GPIO1 LED at location 00H
- Tick — 10ms tick produced by 89C2051 (available for time trigger experiments)
- Text LCD interface — direct CPU bus interfaced text LCD
- Brownout reset — KIA7042 reset chip for power brownout reset
- HALT and INTE bit indicator LEDs
- Power conversion — +12V and -5V power supplied via on-board MC34063 DC/DC converter and Intersil ICL7660
- Power consumption — 500mA @7.5V via external AC adapter
- Expansion header — 40-pin (2x 20 pins)
Full schematics of the board, along with its user manual and monitor firmware code, are available from Sirichote’s website.
Making it do stuff
I created a small 8080 asm program that can play simple songs on the 8080 Microprocessor Kit, by sending 1-0 square waves to its built in piezoelectric beeper. You can download the latest version of my “8080 Daisy Player” from DeviceGuru.com here (contains asm and hex). Version 33 now includes note codes for three simple songs: Daisy, Sunshine, and Happy Birthday. To change songs, you can recompile the asm file after altering the code at “begin:” to “lxi h,sunshine” or “lxi h,birthday”, instead of “lxi h,daisy”. And you can easily create new songs using the “Note codes” at the bottom of the asm listing.
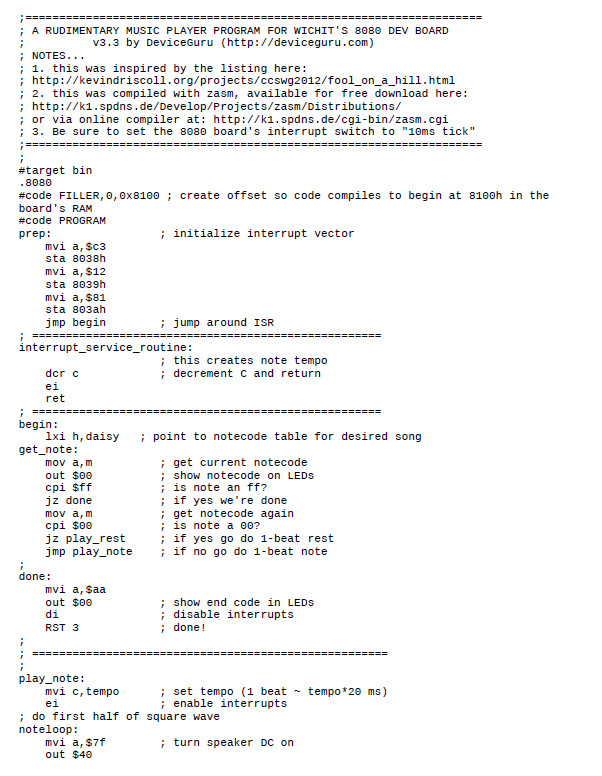
Music Player code listing (page 1)
(click image to enlarge)
An excellent, free-to-use online 8080 code assembler can be found here. Select the following options when using the online assembler: “Intel Hex,” “with opcodes,” “–8080.” Alternatively you can install zasm on Linux and assemble it with a command like “zasm -x 8080-music-player-v33.asm.” My latest (v33) music player code is available for download here [pdf file link]. I use minicom on linux to communicate with the 8080 Microprocessor Kit board (typical command: “sudo minicom”).
Want one?
If you’re interested in ordering one of Sirichote’s 8080 Microprocessor Kits (either as a kit or fully assembled/tested), you can get in touch with him via his website at www.kswichit.net, where you’ll find his email address listed in several locations.
— posted by DeviceGuru on Jun 11, 2019