Adding Wbar, Prism, and Gadgets to Ubuntu
Last updated Jan 20, 2009 — 53889 views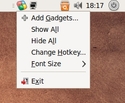 After recently reviewing the gOS Gadgets Ubuntu-remix, I decided to try adding Mozilla Prism, Google Gadgets, and a Wbar animated application-launch icon dock to standard Ubuntu. Here’s how to do that.
For starters, I downloaded the Ubuntu Desktop 8.10 iso image file and performed a fresh install in a VirtualBox virtual machine.
Adding an animated application launcher
The first step is to install Wbar, a desktop add-on that provides an attention-getting animated application-launch function.
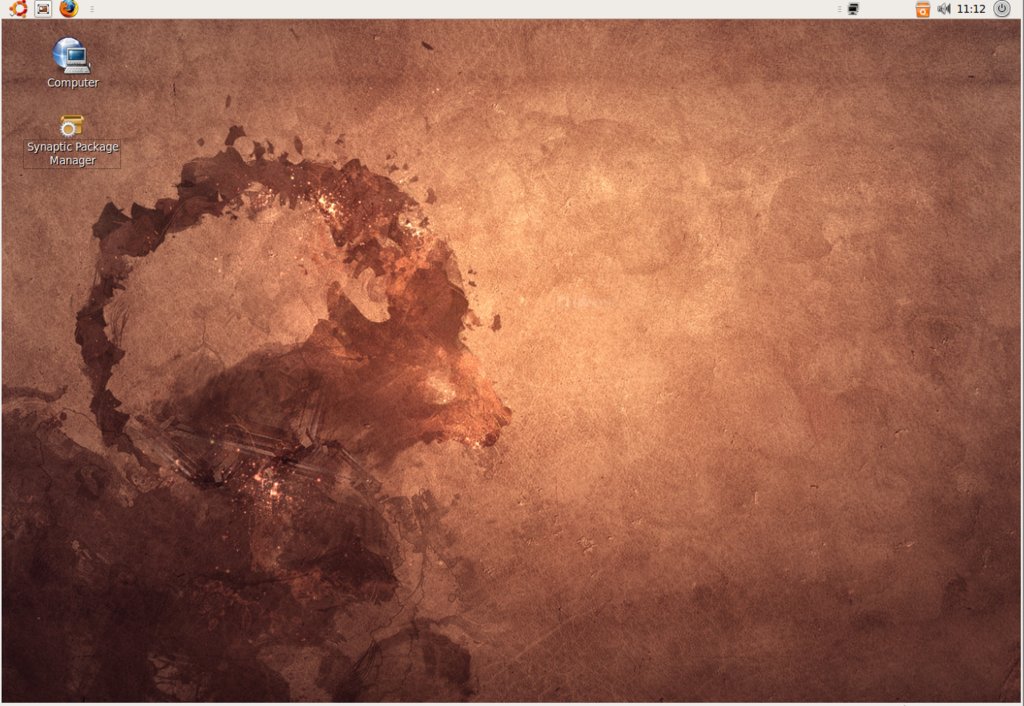
Since Wbar’s animated-icon dock would need to occupy the bottom of the desktop, made room there by eliminating Ubuntu’s lower taskbar/launcher panel. To do this, I merged the functions normally divided between the desktop’s upper and lower panels into a single, upper panel. This was easy to do, using functions available by right-clicking on each of the panels.
In my case, the result looked like this:
Single-panel Ubuntu desktop
(Click image to enlarge)
Now, it’s time to install Wbar. To do that, go to Google’s Wbar page, and download the .deb file (currently named “wbar_1.3.3_i386.deb”) to your desktop.
Next, double-click that package’s icon on your desktop. This will install the Wbar package along with some dependencies.
Once Wbar is installed, you can quickly test it by issuing the following command from a console (Menu > Accessories > Terminal) window:
-
wbar -pos center -above-desk
Did that deposit a Wbar application launcher dock in the middle of your deskop?
Assuming that was successful, it’s time to add Wbar to the list of applications that start automatically when GNOME loads. To do this, start GNOME’s Sessions configuration tool (Menu > System > Preferences > Sessions), and add Wbar to the list of startup programs. For its startup command, enter: “/usr/bin/wbar_start”.
Next, download this file to your desktop, set its permissions to executable (“chmod +x wbar_start”), and move it to /usr/bin/ on your system (“sudo mv ~/Desktop/wbar_start /usr/bin/).
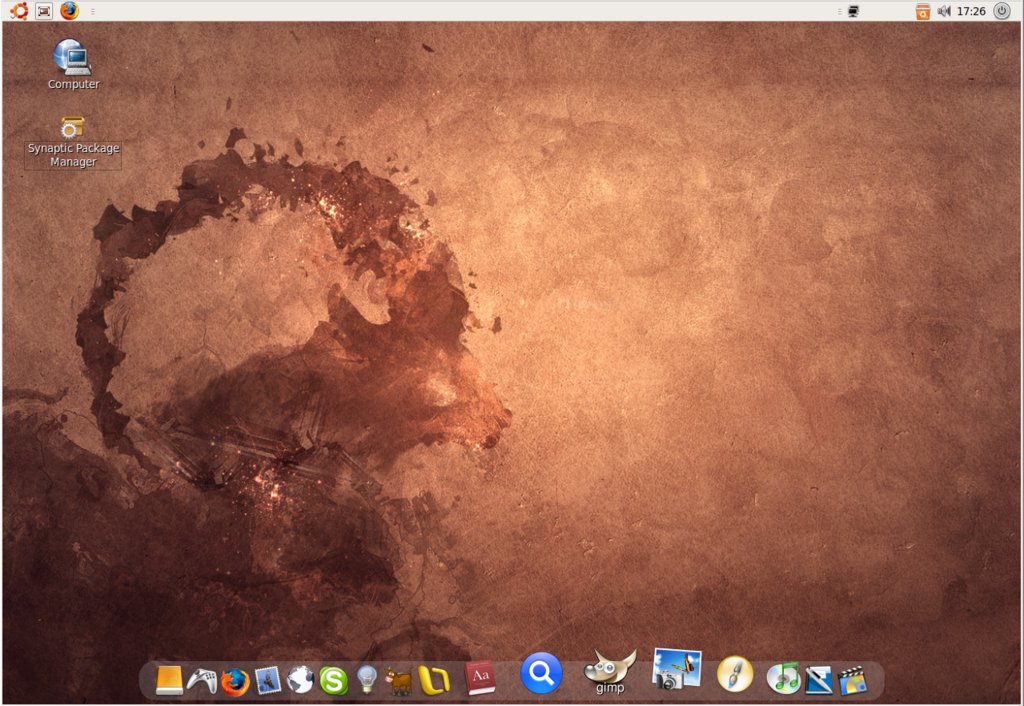
To test it, reboot your system and see if the Wbar launcher dock shows up on the bottom of your Ubuntu desktop. In my case, it looked like this:
Ubuntu desktop with default Wbar dock
(Click image to enlarge)
At this point, I suspect you’ll be eager to customize the contents of your Wbar application-launcher dock. This is easy to do using Wbarconf, the Wbar configuration utility. To install wbarconf, go here, download its .deb package (currently “wbarconf_0.7.2-1_i386.deb”) to your desktop, and double-click the resulting wbarconf icon on your desktop.
Now, use Wbarconf (Menu > Accessories > Wbarconf) to add/remove/rearrange the application-launch icons that appear in your animated icon dock.
Use Wbarconf to customize your Wbar launcher
(Click image to enlarge)
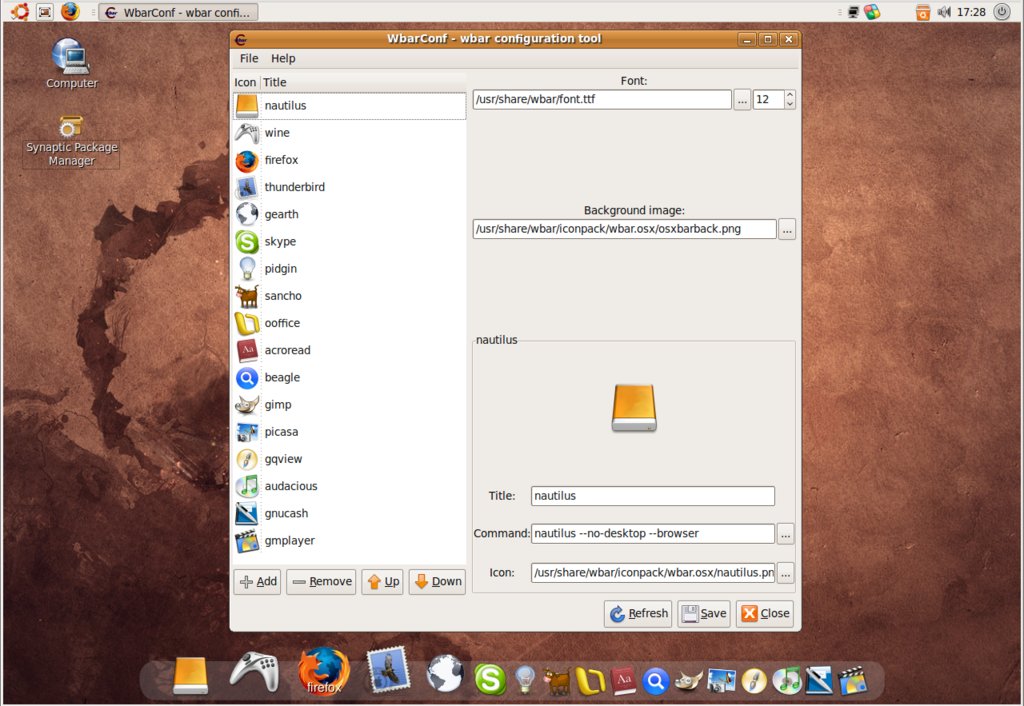
For each launcher you add, you’ll need to specify the application’s name, the command to run (including path), and the program’s icon.
Note Wbar’s default icons are located in /usr/share/wbar/iconpak/. Additional application-launch icons are available in /usr/share/pixmaps/. For adding Google applications to the Wbar launcher (or to your desktop) download this set of icons (courtesy of gOS), untar them, and place them somewhere convenient (/usr/share/pixmaps/ would be ok).
Following reconfiguration of Wbar, my animated application-launch icon dock morphed into this:
Customized Wbar dock

If you tried some of the Google applications and discovered they didn’t work, don’t be too surprised — we haven’t installed Mozilla Prism or Google applications yet. Let’s do that now.
Installing Mozilla Prism and Google Prism applications
Adding Prism to your Ubuntu system is quite easy, using the Synaptic Package Manager (Menu > System > Administration > Synaptic Package Manager). Once Synaptic is running, type “prism” in the Quick Search box at the top and select the prism package (by clicking on the box to the left of its name in the Package list) for installation. Then click the Apply icon at the top of Synaptic to install Prism.
This would also be a good time to install any Google applications of interest. To do this, type “google-prism” in Synaptic’s Quick Search box. Select from among the half a dozen or so Google Prism applications that show up. In my case, I selected google-prism-mail, google-prism-calendar, and google-prism-docs for installation. After you select the ones you want, click Synaptic’s Apply icon to install them. Then close Synaptic.
This would be a good time to test your new Prism apps, by finding them in your system menu. Google Mail ends up in the Internet group, while Calendar and Docs end up in the Office group; you’ll need to hunt for any others that you install.
I like how fast the Google Prism apps open up, and how they appear to be resident applications running on your desktop. Here’s how the three I installed look:
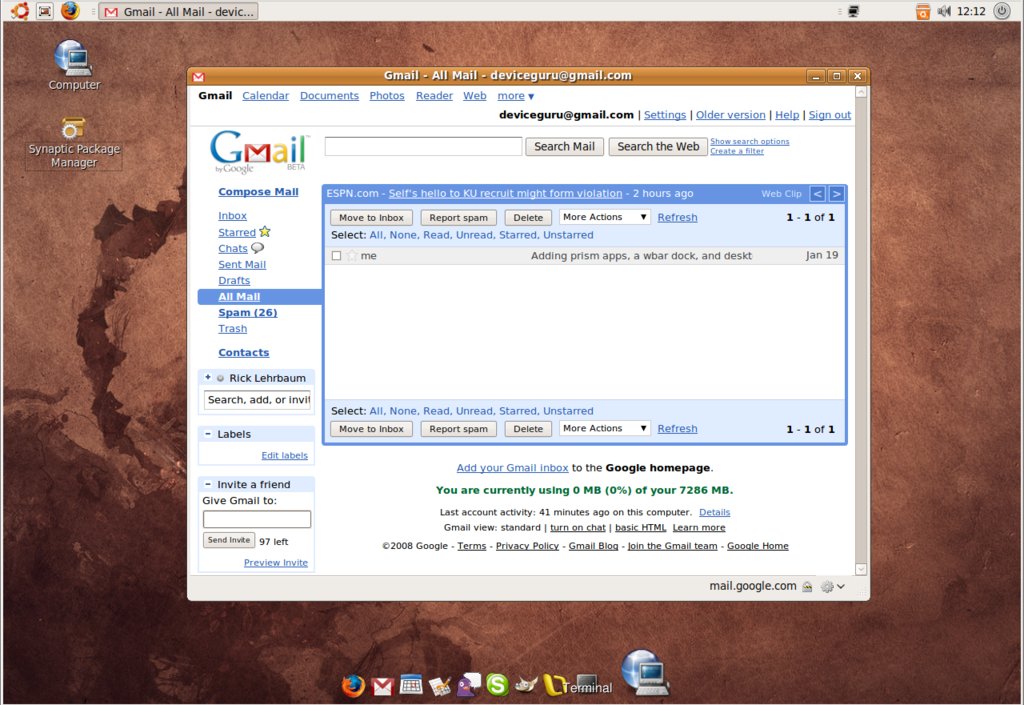
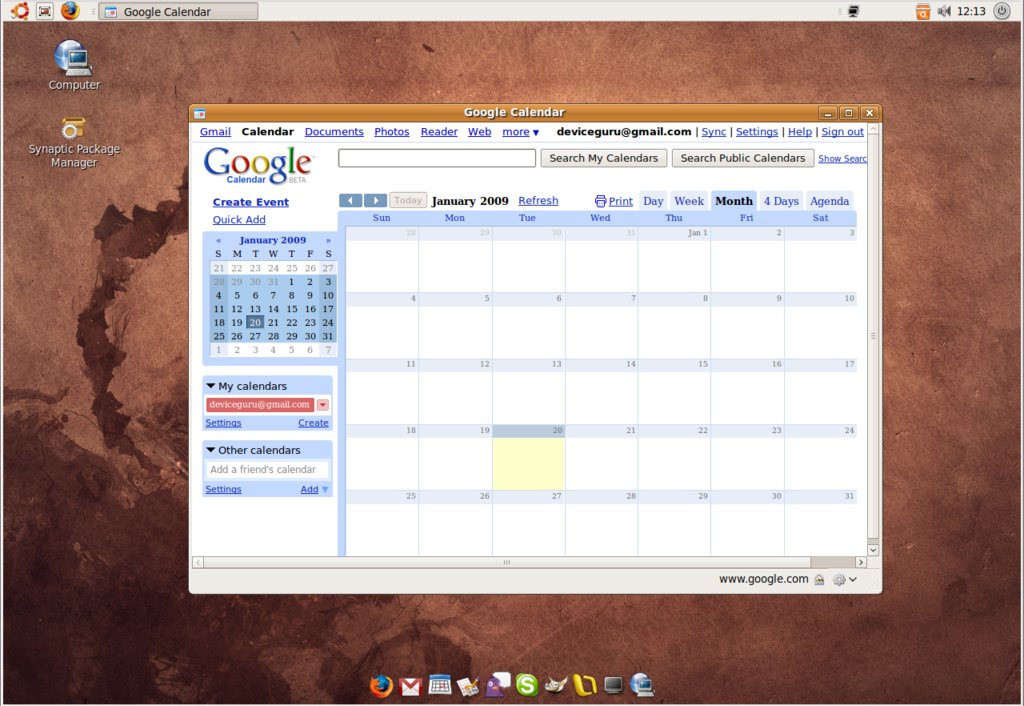
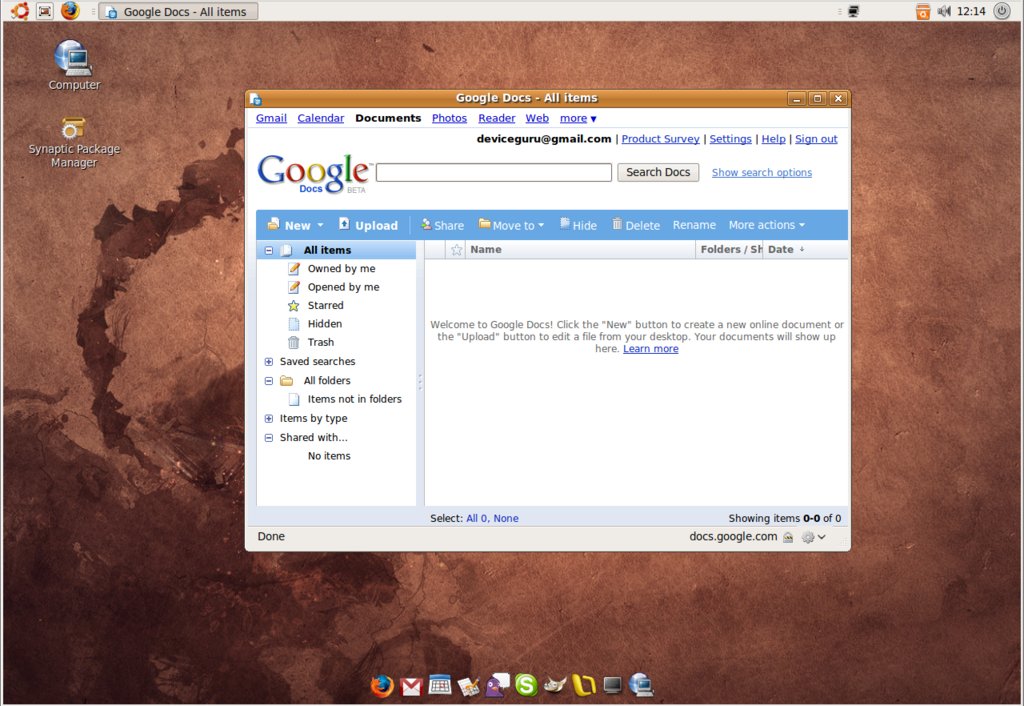
Three Google Prism Apps: Mail, Calendar, Docs
(Click each image to enlarge)
Going gaga over Gadgets
Now let’s decorate your Ubuntu desktop with your choice of Web-based mini applications.
To get started, go here to find the .deb package for Google Gadgets (currently “google-gadgets_0.10.4-0~getdeb1_i386.deb”), download it to your desktop, and double-click the package’s icon on your desktop to install it.
Next, use GNOME’s Sessions tool (as above) to add the following command to the list of sessions to be started automatically when GNOME loads, calling it Google Gadgets:
-
ggl-gtk -ns
 At this point, you can test Google Gadgets functionality by restarting GNOME (or rebooting your system). Do you see the multicolored Google Gadgets icon (see screenshot at right) showing up in the status tray on the right edge of your desktop’s upper panel?
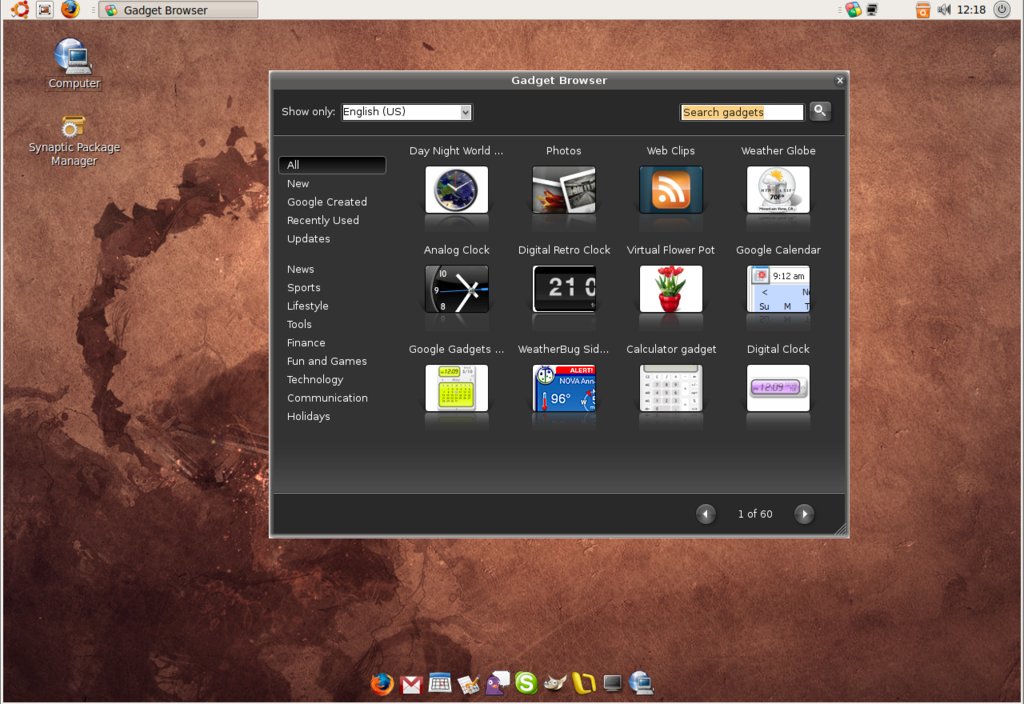
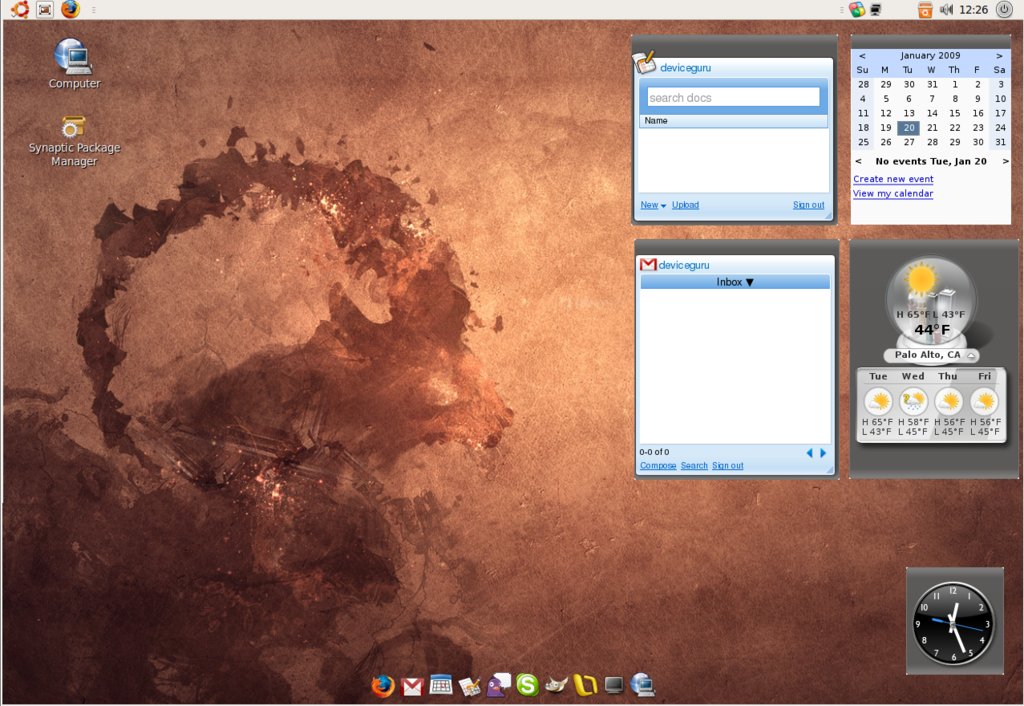
Right-click the Google Gadgets icon for a list of configuration options. Click “Add gadgets” to browse a catalog containing hundreds of available gadgets. The following screenshots show the Gadget Browser, and my Ubuntu desktop after I’ve added some gadgets:

Gadget Browser (left) and Ubuntu desktop with gadgets (right)
(Click each image to enlarge)
Well, that’s all there is to it!

[Acknowledgement: Thanks go to the Ubuntu-based gOS Gadgets OS for inspiring me to write this article, and for being the source of the Google Applications icons referenced above.]
awesome piece just what i have been looking for. esp the part about wbar .. keep up the good work. cheers
I am having severe issues getting the wbar to work on Ubuntu 8.10 amd64. I tried the .deb and it’s telling me I have the wrong architecture. I have also tried some ideas from the Ubuntu forum. Do you have any other ideas of workarounds for this?
Is there a way to make it always on top? Or make my apps end over wbar?
I’m wondering how many RAM should my PC have to make all this work? I feel like my 384MB is not enough 🙁
@Andrily: Good news… I just installed everything described in this article on an old ThinkPad (model 2662-35U, with a 600MHz Pentium III CPU, 320MB DRAM, and 20 GB HDD) and confirmed that everything works perfectly on that system.
Great 🙂
Thanks a lot for sharing the info.
@deviceguru: thanks! now it looks interesting for me 🙂
Unfortunately, I can’t get the Wbar to appear after a restart unless I hit the “refresh” button on the Wbar config GUI.
I think the problem is the inability to get the wbar file “executed”. Here is the step that I and many others might not have done correctly…..
“Next, download this file, set its permissions to executable (”chmod +x wbar_start”), and move it to /usr/bin/ on your system (”sudo mv wbar_start /usr/bin/).”
When downloading the above file, all I got was a read only text. What should I do with that text ? And how do I go about doing it ? Please give specific steps in detail for us newbees. Thanks.
@Phil: Oh, sorry. What you need to do is to save that file on your Desktop first. In Firefox, you’d do that by mousing over the link (to the file), right-clicking, and then selecting “Save link as…” Once you’ve saved it, then you can perform the “chmod +x wbar_start” and then “sudo mv wbar_start /usr/bin/”. The last two steps need to be done from within a console window (use Menu > Accessories > Terminal). Does that help?
I followed your directions exactly…. did a right click on the link, saved file on desktop,then went to the terminal and entered
chmod +x wbar_start
This is what I got in return….
chmod: cannot access wbar_start : No such file or directory
@Phil: ok, let’s try it this way:
1) download the file wbar_start to your desktop (I think you’ve done that)
2) on your desktop, right-click the icon for wbar_start and select “Properties” and then the “Permissions” tab. On the Permissions tab, check the box where it says “Execute [ ] Allow executing the file as program”, and then click “close” to finish setting the file’s permissions.
3) now open up the terminal program (use Menu > Accessories > Terminal) and type the following command (without the quotation marks): “sudo mv ~/Desktop/wbar_start /usr/bin/”
…Did that work?
Unfortunately, that didn’t work either. After playing around with wbar for awhile, I was able to get it to work after restarting – but only with the wbar_start file in the “user” or “desktop” directories, and having changed the command in sessions to reflect that. Obviously, this is not a long term solution.
The “wbar_start” file cannot be moved into /usr/bin/ under the directions you have given here, at least for me. I’ve tried it on two different computers, at least four times, with a fresh install on one of them. The problem each time is that when trying to move “wbar_start” from the desktop to /usr/bin/, access is denied because to access /usr/bin/ the user needs root privileges. Using “sudo” in terminal didn’t work either because it doesn’t recognize the wbar_start file for whatever reason.
Just to clarify the previous post, I should have said that I can only get wbar to restart when the wbar_start file is located on the “desktop” or “myname” home directories and then changing the “sessions” command line to reflect that.
I like wbar for a light-weight bar/dock. Is there anyway to show/attach dynamic icons/processes? As an example, StarDock (Windows) has a weather app that shows the bar/dock. It updates itself periodically, and if you hover over it, it poofs out to show a 5-day forecast. Having dynamic icons/processes would make it even more interesting.
This is sweet! One thing I have not found how to do:
Google Calendar notifications (without opening the calendar itself, or connecting with Evolution/Sunbird, etc.)
There are plenty of apps for new mail notifications, but nothing for calendars (with snooze option would be best). In windows, the Google Calendar gadget gives notifications, but not in Linux.
I’m having the same problem as Dustin. (Mythbuntu Intrepid Ibex AMD64) I am trying to build it from source, and it doesn’t have a configure file, so I’m just getting all kinds of nasty errors. Do you have any suggestions on either another way to attack this problem or an alternate apps?
Nice writeup. Many thanks.
For those of you having trouble with the start up script, I found this utility to do that.
http://linux.softpedia.com/get/Utilities/wbar-util-36331.shtml
Thanks for the write up, good job.
1 question: In the original bottom panel, any open apps were displayed in a tab there. How do I integrate that into the top panel?
@BeaMeUp:
> question: In the original bottom panel, any open apps were displayed in a tab there. How do I integrate that into the top panel?
Right-clock on a blank area of the top panel. Click “Add to panel,” select “Window List” from the list of functions, and then click the “Add” button to add it to the panel.
I like docks too, but why not just make the lower gnome panel into a dock? You can adjust show/hide, transparency, and other things by using the gnome configuration editor. Find “panel” in there and you will see extended options for the gnome panels.
I have found that this works better than any dock for linux that i have used. Windows is a different story however, and for that i recommend a dock called “rocketdock”.
Enjoy.
nice article
Very nice … as an FYI, gOS comes with this UI (wbar & Google gadgets) configured on the desktop right out of the box…
I love the articles. I try to install the wbar and got everything working up to the installation of the wbarconf deb file. When I downloaded and save on my desktop, I ran the package, just like I did with wbar, it gave me an error “Dependency is not satisfiable…” Will anyone be able to give me the hint on how to fix this? I actually got the wbar at the bottom and it is working very smooth. Just need to config with the app I needed. Thanks and thank you for a great articles.
What a terrific article! I’ve just discovered GOS via the Australian created Kogan netbook (http://www.kogan.com.au/shop/kogan-agora-netbook-pro/) and am once again in love with computers.
I tried gOS and like it but wanted ubuntu 9.04. I was going to try and get 9.04 to be like gOS and found this article. Helped a lot! thanks!!!
Great !
I was looking for a simple dock for Ubuntu. It’s perfect. Thanks for all the explanations
@Dustin,
If u want install wbar on amd64 u have to download soruces:
http://wbar.googlecode.com/files/wbar-1.3.3.tbz2
After that, u have to edit IconLoader.cc and add in exter “C”:
#include
Also add it in file SuperBar.cc
The last step is to type few commands like:
make, sudo make install
that’s all
BR,
matt2k
extern “C”:
#include
😉
#include
without spaces ofc…
Hi,
installed the wbar following your directions on ubuntu karmic (9.10). Everything worked as expected. Well written! Thanks.
It was cumbersome to add all the apps I wanted and tried to find another way to add apps. Indeed it is possible to drag and drop app links from the Applications, Places, and Systems menu into the left area of wbarconf!
With some items, you need to find the icon, but descriptions (“name” to “title”) and commands are always copied. I can warmly suggest this method of configuring wbar.
All the best,
Uwe
hi there
I installed the wbar through the software centre and although i got it , but can’t figure out how to customize the icons. The default ones don’t work (I have freshly installed Ubuntu 11.04).
———>> The mentioned file is not avaliable:
quote from original post:
“Next, download this file to your desktop, set its permissions to executable (“chmod +x wbar_start”), and move it to /usr/bin/ on your system (“sudo mv ~/Desktop/wbar_start /usr/bin/).”
———————–>> The link for customization of wbar(wbarconf) is also not working, the file not found ERROR message appears.
Any help will be appreciated!