Ubuntu without Unity
Last updated Dec 6, 2011 — 75527 views [Updated Sep 21, 2012] — Although it’s not without passionate supporters, Unity, Ubuntu’s new default user interface has generated considerable controversy and consternation among faithful Ubuntu users since its introduction last year. For those who prefer a traditional GNOME desktop, this post provides a straightforward method of setting up and configuring a current Ubuntu desktop based on GNOME 3’s “Fallback” mode, which works with both Ubuntu 11.10 and 12.04.
This article was originally based on Ubuntu 11.10 but has been updated to include Ubuntu 12.04, which can also be used without the Unity desktop using the method detailed below. The screenshots were made using the original Ubuntu 11.10 implementation. Please note: There is one important difference between the use of GNOME Fallback mode on Ubuntu 11.10 and 12.04: When using Ubuntu 12.04, to add, move, or delete panel applets, or to access and modify panel properties (size and background), you must press THREE buttons at once — the Alt and Windows menu keys on your keyboard, plus the right button on your mouse. With Ubuntu 11.10, on the other hand, those functions require pressing TWO buttons — the Alt key on your keyboard, plus the right button on your mouse. |
What’s so special about Unity?
Ubuntu’s new default Unity user interface marks a dramatic departure from the GNOME desktops of earlier Ubuntu releases. According to Canonical, the distribution’s commercial backer and the instigator of Unity, the new shell brings a more modern “visually rich” graphical user interface to the desktop — one that was “inspired by smartphone and tablet design thinking.”
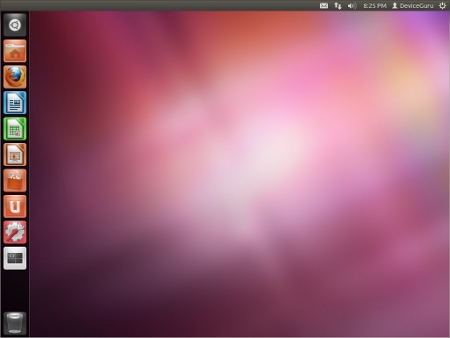
Unity’s clean workspace has a launcher on the left
Canonical’s hope in creating Unity was for a single user interface to be usable on all types of personal computers, including netbooks, notebooks, desktop PCs, and tablets.
In addition to being a departure from past GNOME desktop designs graphically, Unity is also an attempt to “move away from traditional interfaces, embracing fast and powerful search as the best way to find applications and files,” explains Canonical. “This is a trend that comes to Ubuntu from the Web, where users have come to prefer search as the starting point for most journeys. Searching is hosted in the dash. The dash brings files, applications, music and video together in a single location. It’s all searchable through the same bar.”
But do users really want this? Can a common UI really be equally efficient both on mouse-and-keyboard oriented desktops and laptops, and on touch-based tablets? Are users ready to fundamentally alter how they interact with their systems, both graphically and operationally?
As it turns out, many diehard Ubuntu users have tried Unity and rejected it, preferring to stick with the more traditional GNOME desktop style of previous Ubuntu releases, which they’ve been efficiently using for many years.
The question of whether Ubuntu’s switch to Unity as its default UI was a good or bad idea will be answered by its success or failure in the marketplace. But for now, the move certainly seems to have shifted momentum in the direction of Linux Mint 12, an OS that leans on current Ubuntu (and Debian) packages — but avoids Unity entirely.
Rather than suggesting a switch to Linux Mint or other non-Unity Linux distributions, this post shows how you can easily use standard Ubuntu (v11.10 or later) without Unity, by installing a few packages and tools, and tweaking some configuration settings. Although your preferences will probably differ from what’s recommended below, you’ll end up with the tools to tune your Ubuntu desktop’s look and feel to your liking.
For more background on Unity and on Canonical’s controversial decision to make it Ubuntu’s new default shell, check out these resources and articles:
- Wikipedia article about Unity
- Ubuntu’s Unity info page
- A Disturbing Dialog About Ubuntu and Unity (Linux Magazine)
- Ubuntu: Wake up and smell the Unity against you (ExtremeTech)
Sidestepping Unity
One of Linux’s many strengths is that it’s highly configurable and flexible. Accordingly, what appears below is just one way to configure a fresh Ubuntu installation to work without Unity, and in a vaguely Windows-like style. The overall procedure involves installing GNOME Fallback mode, adding a few tools and desktop themes, reconfiguring GNOME’s notification and task panels, and tweaking some settings.
As you’ll soon see, the suggested configuration implements a desktop that features a pair of thin, horizontal panels at its bottom. The upper one is a traditional GNOME taskbar, while the lower panel provides docking space for a main menu button, launchers for a few favorite apps, a status widget tray, and several system control buttons. Alternatively, you can easily setup a more “normal” (pre-11.10) Ubuntu configuration with a taskbar at the bottom and a menu/status panel at the top. The choice is yours!
Oh, and before I get flamed in the comments, I want to make it clear that none of what appears below is my invention — it’s simply a matter of aggregating tips and procedures found elsewhere. Surprisingly, it took a fair amount of googling and experimentation to come up with — and test — a simple procedure for configuring Ubuntu 11.10 or 12.04 to work more-or-less like Ubuntu 10.10.
Installing Ubuntu
For starters, grab the appropriate 32- or 64-bit Ubuntu ISO image for your system from Ubuntu’s download page and burn it onto a CD or DVD. After backing up your valuable data, boot from the Ubuntu disc.
You’ll be offered the option of either trying out the OS without installing it, or beginning the installation immediately. Once you’re ready to began the install, start the process and respond to the few prompts from installer. For typical single-OS or dual-booting installations on desktop PCs and laptops, it’s quick, simple, and straightforward.
Here are a few screenshots of the process:


Installing Ubuntu is a quick-and-easy process
(click thumbnails to enlarge)
After your installation is complete and you boot up Ubuntu, you’ll arrive on its Unity desktop. The screenshots below provide a quick tour of some the basic features of Ubuntu’s Unity desktop. For more details on Unity and its features, refer to the references listed above.
Lots of eye candy here…


Touring Ubuntu’s Unity shell desktop
(click thumbnails to enlarge)
Installing and configuring GNOME Fallback
Here are the steps to follow:
 Open up the Ubuntu Software Center by clicking on this item in the left-column and then search for, select, and install the “gnome-session-fallback” package (see screenshot at right; click to enlarge).
- While we’re in the Ubuntu Software Center, let’s save time by searching for, selecting, and installing each of the following tools:
- Advanced Settings (aka gnome-tweak-tool)
- Configuration Editor (aka gconf-editor)
- dconf Editor (aka dconf-editor)
- “gnome-colors”
…after installing all these, exit the Ubuntu Software Center app. We’ll use them later.
- Now, log out of Unity by clicking the gear-shaped widget at the right edge of the top panel and selecting “Log Out” — see this screenshot.
 This brings you to the login screen from which you’ll return to your Ubuntu desktop, but in a non-Unity mode. Click the gear-shaped widget shown at the upper-right corner of the login block in the middle of the screen, and select “GNOME Classic” from the drop-down list (see screenshot at right; click to enlarge).
 Enter your password followed by hitting the Enter key, and you should find yourself at a blank GNOME desktop like that shown at right (click image to enlarge).
 Next, alt-right-click (Ubuntu 11.10) or alt-windows-menu-right-click (Ubuntu 12.04) on a blank area of the upper panel, select “properties” in the dropdown list, and choose “bottom” to move the status panel to the bottom of the desktop (see screenshot at right; click to enlarge).
Configuring the panels
At this point, you’ve created a dual-lower-panel GNOME desktop. The upper of these two panels contains a tray where tabs will appear corresponding to each app you open. The lower of the two panels needs to be configured next. The following steps will add an apps/places menu button, shut-down button, space for docking favorite app launchers, status notification area, and volume and trash widgets to the lower panel:
- Alt-right-click (Ubuntu 11.10) or alt-windows-menu-right-click (Ubuntu 12.04) over the “Applications Places” widget at the left end of the lower panel and then select Remove from Panel; then do the same with the username widget located near the right edge of the lower panel
- Now, alt-right-click (Ubuntu 11.10) or alt-windows-menu-right-click (Ubuntu 12.04)over the date widget in the center of the lower panel, select “Move”, and slide it over to the right section of the lower panel.
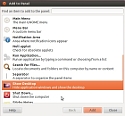
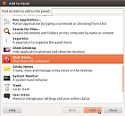 Alt-right-click (Ubuntu 11.10) or alt-windows-menu-right-click (Ubuntu 12.04) over a blank area of the lower panel blank area, click “Add to Panel”, and then select/add the following widgets: Main Menu; Show Desktop; System Monitor Trash; and Shut Down (see screenshot at right; click to enlarge).
- Use the alt-right-click/move process (as above) to reposition all the newly-added widgets to where you want them.
 Alt-right-click (Ubuntu 11.10) or alt-windows-menu-right-click (Ubuntu 12.04) over a blank area of the lower panel, click Properties, and adjust the panel’s Size to 32 or more pixels, or whatever size you prefer (see screenshot at right; click to enlarge); then make a similar adjustment to the upper of the two panels (the taskbar).
Here’s how your Ubuntu GNOME Fallback desktop might look following the above procedure steps:
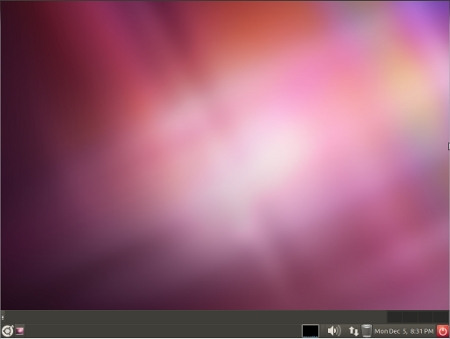
(click to enlarge)
Tailoring and dressing up the desktop
We’re nearly done. Let’s go through a few additional steps to further tailor the system to our needs…
- Drag favorite app launchers from the main system menu to the lower panel dock. Note that the lower panel dock has three distinct regions — left, middle, and right — to which you can drag app launchers. For our example, we’ve added these favorites to the left section of the dock: Home Folder, Firefox, Thunderbird, Terminal, Text Editor, Calculator, and the Banshee music player; you’ll find them all in the Menu system (note: the Home Folder is located in Menu > Places). Of course, your list will differ from ours.
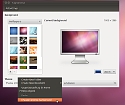 Now’s a good time to change the desktop wallpaper to whatever you like. This is done via a right-click on any blank area of desktop to open up the desktop Appearance tool (see screenshot at right; click to enlarge); then select Change Desktop Background. I installed my favorite, a NASA nebula image after clicking the + symbol below the thumbnails of the default wallpaper options, and navigating to the Downloads folder in my Home Folder, where I had downloaded it by clicking this link.
Here’s how our Ubuntu GNOME Fallback desktop looks at this point:
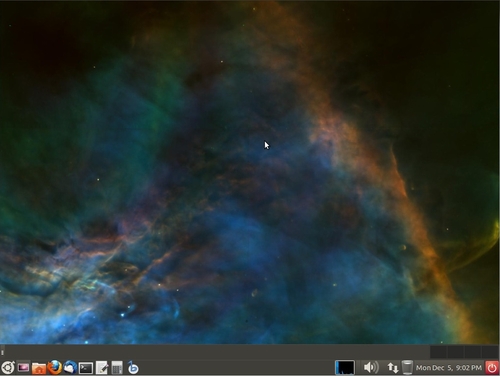
(click to enlarge)
Now, let’s proceed with a few more UI and theme tweaks:
- Using Advanced Settings (Menu > Other > Advanced Settings), let’s configure some desktop theme settings:
- Select the Desktop tab and enable all of the desktop icon options (Trash, Home, Computer, Networking, and mounted drives); see left screenshot below.

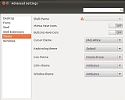
(click thumbnails to enlarge)
- Select the Theme tab, and from there choose your preferred Window, Cursor, GTK+, and Icon themes; the screenshot at the right, above, shows the settings used in this post.
- Select the Desktop tab and enable all of the desktop icon options (Trash, Home, Computer, Networking, and mounted drives); see left screenshot below.
- Next, let’s change the position and order of GNOME’s close/minimize/maximize buttons from Ubuntu’s default upper-left position and arrangement (which is similar to the arrangement of Apple’s OS X colored blobs); instead, we’ll move them to the upper right and use an arrangement that matches Windows 7’s (minimize/maximize/close).
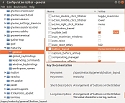 To accomplish this, open up the Configuration Editor (Menu > System Tools > Configuration Editor), navigate to apps > metacity > general (see screenshot at right; click to enlarge); then, enter new text in the contents of the “button_layout” variable, to set its value to “menu:minimize,maximize,close” (but without the quotation marks), and hit Enter to activate it — the new window management button scheme should immediately take effect on the tool’s window.
 Now, let’s change the GNOME theme’s text highlight color from Ubuntu’s default orange to a shade of blue, consistent with our selected “GNOME Brave” theme. To modify the highlight color, open the dconf Editor tool, at Menu > System Tools > dconf Editor; using the tool, navigate to org > gnome > desktop > interface, and find the line labeled gtk-color-scheme (see screenshot at right; click to enlarge).
 Enter a new value for that variable by copying the text from the line below, and then press the Enter key to activate it (see screenshot at right; click to enlarge).
-
bg_color:#f0f1f2;selected_bg_color:#899cb5
The text highlight color in menus and elsewhere should immediately change to the new value.
- One more theme adjustment is to change the color of the minimize button (the “X”) located at the upper-right corner of windows from Ubuntu’s default orange color to something that matches our theme. Unlike other tweaks we’ve made, this one requires opening up a terminal app and entering a couple of commands on the Linux command line, to install the Ambiance Blue Theme Suite. Don’t worry, it’s not hard; just follow these steps:
- Open up the Terminal app (Menu > Accessories > Terminal)
- Type each of these commands followed by the Enter key…
- sudo add-apt-repository ppa:satyajit-happy/themes
- sudo apt-get update
- sudo apt-get install ambiance-blue-theme
 Now, open up the Advanced Settings tool (Menu > Other > Advanced Settings), select theme in the left section, and choose “Ambiance Blue” for both the GTK+ theme and Window theme settings (see screenshot at right; click to enlarge). The background of the “X” widget in the upper-right corner of the tool’s window should immediately change from orange to blue.
Ta-da!
So that’s it! We’re done. Here’s how our finished Ubuntu desktop looks:
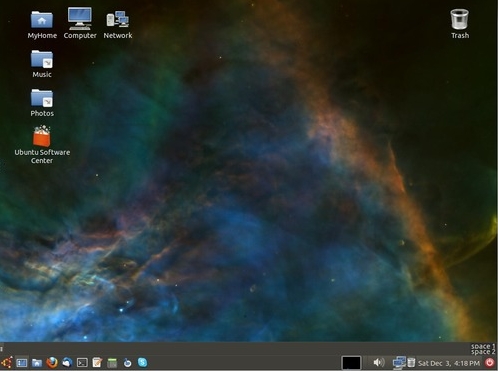
Ubuntu GNOME desktop with personalized settings
(click to enlarge)
The screenshots below illustrate many of the steps of the configuration process described above.




Tweaking Ubuntu’s GNOME Desktop
(click thumbnails to enlarge)
Here are some screenshots showing our modified Ubuntu GNOME desktop:


Touring the tweaked GNOME desktop
(click thumbnails to enlarge)
All this, and Unity too!
It’s important to realize that, although we created a modified GNOME desktop similar to the GNOME desktops of Ubuntu 10.x and earlier, we haven’t eliminated Unity from the system. As you can see in the screenshots below, you still can logout of your modified GNOME (“GNOME Classic”) desktop and then login to the Unity desktop to see what you’re missing and familiarize yourself with it (select “Ubuntu” from the gear symbol dropdown when logging in). And then you can return to the modified GNOME desktop by logging out of the Unity desktop and selecting “GNOME Classic” from the gear symbol dropdown when logging back in.
Whichever shell you were using during your last desktop session is what comes up when you login next time, unless you select a different shell from the gear symbol dropdown at the login prompt.


Switching back and forth between GNOME Classic and Ubuntu Unity
(click thumbnails to enlarge)
Who knows — in time we all may come to love Unity!
For further information
You can download the free Ubuntu operating system from the Ubuntu.com download page. If you prefer moving to an alternative, a ready-to-use, non-Unity GNOME/Linux distribution derived from both Ubuntu and Debian Linux packages is available for free download from the Linux Mint website. For more details on Unity, visit Ubuntu.com’s main Unity page. For additional GNOME 3 themes beyond the Blue Ambiance one referenced in this post visit the Gnome Look website.
As part of my job, I’ve to test various linux distros & other OSes whenever a new version is released. this Ubuntu release with the Unity desktop is the user *unfriendliest* of all.
So, it’s not only MS that screws things up.
Linux wise, I’ve already shifted to Mint & I love it.
GNOME Shell is by no means the traditional GNOME desktop!! GS has generated A LOT of controversy and plain,simple dislike itself…
Most people are content with Gnome 2.3. And we say always “never leave a winning team”….!!
O yes, there are other desktops like it such as Xfce (great!), Lxde (fine), KDE (alright after years of pain) etx. And Mint Gnome 3 of course with MGSE or with a Gnome 2.3 like MATE, which maybe have some tiny problems and bugs, but is a perfect simple solution. I think the next one (nr. 13 I suspect) will be fine.
Poor Ubuntu. But maybe they come back…
Here’s an even easier method of setting up Ubuntu without Unity:
1) Install Linux Mint.
2) Done.
No screencaps or walkthroughs needed.
From the screenshots and descriptions, it is apparent that you are not actually using GNOME Shell at all, here. The dual-panel layout with ‘Applications’ and ‘Places’ buttons is GNOME 3’s fallback mode, not Shell. Shell looks very different and does not have configurable panels.
No-one will be able to use this approach with Shell proper. Anyone wanting to follow this walkthrough who is actually using Shell will need to force GNOME into fallback mode first: go to System Settings, System Info, Graphics, toggle the ‘Forced Fallback Mode’ switch, and log out then back in again.
Give Pinguy OS a try.
Thanks for the comments and suggestions! I’ve modified the procedure to install the more minimal Gnome Fallback Session package (aka “gnome-session-fallback”), rather than the larger Gnome Shell package, and removed all references to Gnome Shell.
If only Canonical stopped the stupid, unproductive, annoying menu-stealing …. (moving menus to top – for longer mouse travel and to confuse users of new applications)
Oh lets all use Mint 12, not. I want my running applications to show on the bottom panel and the top panel as well. Want menu’s, sure have Mint menu on the bottom panel and another on the top panel!
You all gripe about Unity and GnomeShell and then praise Mint 12. Mint 12 default layout is awful, given the choice I’d choose pure GnomeShell any day over Mint 12.
Hi agree with Ambleston Dack on this. The new menu looks rubbish and you cant adjust it. The previous menu was what we wanted. App panel @ the top… wtf. Its just horrible. I’m back to unity and love how polished it is.
Fantastic, well written article. Lots of very useful information. Thanks
Nice article but for a more traditional desktop you need to find a terminal in Ubuntu 11.10 – it is there and proves how unfriendly Unity is if you have to search for a terminal, but once you are there. Type in
sudo apt-get install gnome-shell
Now let this run by providing your password. Once it is finished restart your computer, at the login screen at the toothed wheel just to the right of where you input your password you now have option of Gnome classic, or Unity if you are so convinced, but at least you now have an option.
Thanks a bunch. I loved using this to tweak my desktop the way I wanted it. I did things differently, but what I liked best about your tutorial is that walking through it helped me to understand the available flexibility.
Canonical seems to be aping the Apple interface, but without the guiding genius necessary to make it dramatically better.
Am I the only one ? I like Unity and it’s the first Linux desktop which attracts common end users such as (my) friends, neighbors, co-workers in terms of look and usability regarding their basic needs as to start a browser, write a letter or watching videos. I think, Ubuntu did the right step although Ubuntu should not have removed the traditional Gnome desktop – as a fallback desktop – that early.
Why go to any trouble at all to make Ubuntu 11.10 serviceable? Same goes for Mint 12.
Strip away the shell extensions and it is just another unusable “buntu”!
Mint Debian is Mint 11 without Unity and Gnome 3. It is a fully serviceable operating system. If one likes one can take other “buntus” such as Zorin, and with little effort have a machine the just works — jave apps, compiz, etc. And then, there are Debian based distros with a KDE desktop. No need to play tedious games with Ubuntu and Mint 12 trying to make them what they are not. All just IMO.
Retlaw
I just followed your very detailed instructions on how to make Ubuntu 11.10 usable without Unity.
Your instruction were by far the most accurate & complete I’ve ever attempted to follow from anyone. I only wish you could see the smile of appreciation on my face. I know you put in allot of work into this and I only hope you’ll have the time to do the same for Ubuntu 12.04 (LTS).
I have nothing against Unity except that its not really what a desktop OS should be. Thanks to DeviceGuru I now have what I really needed.
In the real world Ubuntu should have done something exactly like this from the start and avoided all the BS..
Thanks again
Thomas Drazul
Actually, the first time I put this procedure together I installed the full Gnome Shell. But after a while I realized that only a subset was needed for the Gnome Fallback mode. So I started over and only installed Gnome Fallback mode, which is what the current version of this post is based on.
FYI, here are the packages that the two alternatives cause to be installed. Maybe you can point out what, from the longer Gnome Shell list, would be useful to have in a system running Gnome Fallback. If it’s just one or two, they could be added separately, but there are a lot, then the process could be modified to go for the full Gnome Shell addition while only actually using Gnome Fallback mode.
Gnome Fallback — running “sudo apt-get install gnome-session-fallback” from the command line installs…
Gnome Shell: — running “sudo apt-get install gnome-shell” from the command line installs…
…I’ll be interested to learn which packages in the second list you think are important for a decent Gnome Fallback mode desktop experience (I’ll be studying the list, too).
Thanks!
I’m still running Ubuntu 10.10 because I’m too lazy to upgrade every new release but also because it has something I use a lot. That is the choice of any of 4 desktops from right in the bottom of the screen. I couldn’t tell for sure, but it doesn’t look like it is there in your screenshots of the Gnome fallback. If it’s not there, its a deal breaker for me.
Yes, the window switcher is present. I configured the switcher to two windows, instead of four, and named them “space 1” and “space 2”. You can see them at the right end of the taskbar (the upper of the two panels), in the final desktop tour.
Thanks for the tutorial it was really interesting, and I say this despite the fact that I really like Unity. Just two comments:
First: From my point of view, Gnome shell is much worse than Unity (need lots of tweaks to make it usable). I agree that the Mint team have done a great job tweaking the Gnome Shell, but when I tried Linux MInt didn’t like it’s look and I had to do some additional tweaking (I deleted the bottomm panel, the mint menu, the window list changed the themes, and installed Avant window navigator, wellch, and screenlets) to make it usable and nice. Unity doesn’t need much tweaking to get my support (I just installed wellch and screenlets to make it nicer) and I quickly got used to it.
Second: If you like Gnome 2, you’ve got other easier options like installing Ubuntu 10.04 LTS, Debian 6, and Mint 11, all of them will be supported for another year, and by the time (2013) all these distros are not supported, MATE will likely be a mature gnome 2 fork to be considered. Nevertheless, I insist that this tutorial is great if you like playing and experimenting with your PC, but it wouldn’t be my first option if I wanted to keep using Gnome 2
There are different formats for different folks. I was never happy with the Unity layout. I got used to it, which is not the same as happy, but the Gnome Classic is more to my liking. Now on the browser I get the standard Gnome scrollbar, while Evolution gives me the Unity scrollbar. How do I convert everything to the Gnome scrollbar?
Tried Unity and Gnome Shell…. Gnome Shell looks better and works better….
I find that GNOME like Unity not very ergonomic when it comes to some jobs that need the following:
a) frequent switching between files and windows
b) working with several files of the same type, for e.g. several Writer or PDF files
Cairo Dock though wonderful does not ‘spell out’ the names of files names at a single glance. (More Clicks needed & file names cannot be readily seen).
This is because the functionality of the bottom panel is the best for certain tasks. Now for these tasks in Ubuntu I have to log out of Unity and log into GNOME where I use this extension ( https://extensions.gnome.org/extension/3/bottom-panel/ ). This helps me a lot in certain tasks.
I hope Ubuntu can give us such an extension that is very useful and when not needed can be removed with just a mere click. It can easily brought back when needed with a simple click in Firefox. I feel this will be a killer feature for Ubuntu 12.04.
Some people have suggested one can use GNOME Classic, but it is not that attractive as GNOME or Unity.
So the search for the elusive bottom panel with Unity on the side goes on …
I like the Gnome Classic look, but stacking the tools became a problem. I like a clock widget that is always on top. I changed the mutter windows manager back to Compiz. Here is the link explaining that procedure: http://www.tuxgarage.com/2011/10/running-gnome-classic-with-compiz.html
I read with amusement complaints of having to tweak a Linux distribution. At least you CAN tweak Linux. Try tweaking Windows.
unity turns my pc into pretty mcdonald’s cashier machine. Now I have 27 inches wide mobile phone desktop, that’s hilarious and I love it. But I’m retarded, so dont count my opinion
I too tried both and came to the same conclusion. Very happy I switched to gnome 3.
If Unity is so good, why are so many trying to get rid of it?
Worse, why are so many trying to publish stuff like this, saying the did get rid of it, and gleefully saying, after a lot of hocus pocus, they just painted a poor picture, gotcha, it is still Unity?
Well, that is what you have done.
1) Your article is a typical misleading lie. You don’t get rid of Unity (the reason most left), you just muddied the waters, and put more processor time to waste, than Unity does.
2) Then you compound the falsehood, by gleefully saying you can do the poor imitation of gnome (with Unity also running in the background wasting computer cycles) by logging in, differently…
3) I didn’t buy the lies the media told me, about windows, the current political set up… and Unity either.
If Canonical wants to go the way of Unity… Good. The bankroller paid for it, and he can thumb his nose at the (now gone) community, if he wants.
But, the bubblegum ware that is the current phone set-ups, they are trying to work into, are only toy ware for kids, not computers for work.
In a few years (2 or 3 tops), Ubuntu will have missed the real market, and Android will have evolved to something different…
But, Ubuntu will be running a system dated by 4 years of hardware aim… Processors are not going to be ARM weak.
I too Hate Ubuntu’s unity…why the hell these ppl have limited the customization in ubuntu 11.10…..just dont like it….:( and As I installed Gnome shell then it was not supported properly in my lappy due to ATI driver ….anyway m going to install ubuntu 10.04 LTS 🙁
You are going to have to explain how I am wasting cycles with Unity running on the background. Unity is a shell. Gnome fallback is a shell. The only process I am running that I might consider Unity is unity-window-decorator. I freely admit I could be wrong, but please show me my error.
You are ‘kind of right’ about Unity being a shell, sort of.
What you are thinking, is that Linux runs, with a thin veneer of Unity on top, and that it (Unity) is removed, so that Gnome runs on top.
You are thinking less than accurately.
Checking processes, when loaded, you have all that is unity running (not a thin veneer, but a kludged together major amount of stuff, some small part of which is moved to allow another amount of stuff, to run in tandem, when Gnome is allowed in.
When loaded with Unity “AND” Gnome, things run slower than if real Gnome is running. (that is, if you can get Unity running, as slow as it is)
I have spent an entire weekend trying to get it running… Almost like being on a 486 running poorly, again.
I have tried Unity, hated it, hated trying to make it work, hated trying to figure out how to install drivers.
Also… Getting a bit pissed about your site invading my computer with intrusion attempts. Nice to know I have blockers…
When I check all my computer’s processes, I find six Gnome processes and one Unity process, the aforementioned unity-window-decorator. Now I don’t know what the unity-window-decorator is. How many cycles could it be using?
BTW I don’t know about my site invading your computer. I don’t have a site.
Until I locked the isp out, the ‘Device Guru’ was trying to invade my system, while I was typing that message. The ISP number was 72.52.64.45. I posted as replying, since it was seriously harmful attemps. I have it locked out, now, but, this is last call…
Enjoy, Unity, if you will… on the many systems I tried it on, it stank… was slow, and even worse when faking Gnome. Your mileage may vary, but, the processes I speak of, don’t always show.
By his own admission, Unity was still there and running…. argue with him.
You can browse the internet and you will find thousands of tweaking windows 7/Vista/XP tutorials.
Thank you very much. I use linux in opposition to monopolies. I need something that works, don’t really care what it looks like. With Unity my automatic updates would sometimes knock out sound, workspace switcher etc. Also, I was lost as far as finding anything. It was easy following your directions – hopefully I’m done for a while.
This is not targeted to granny or to existing users. This is targeted to new users (kids). They shall learn: this are the programs you SHALL use, this are the music that you SHALL listen, this are the movies that you SHALL see..
They want to transform the PC and internet into something like TV. Provider->user system.
Hello,
I’m stuck at the beginning in my case alt + right-clic does nothing. Neither on panels or elsewhere… I’m using 11.10 x64 on an MBA 3,2. I tried using an USB mouse since I’m not 100% happy with the trackpad (drag-and-droping is a bit of a mess) but this the same. I googled that but all the solutions I found (super + alt + right-clic; alt + left-clic + right-clic) where unsuccessful…
Help anyone?
Thank you very much in advance for your help
-a- (a classic gnome user)
got it! the Alt key was set up to enable 3rd level on the keyboard. For some reason this prevent to use the same key in combination with right-click to enable contextual menu on gnome panels.
It this is ever useful to anyone 🙂
The problem with Ubuntu 11.10 and Unity is the fact that they are full of bugs.There are bugs everywhere.
After Ubuntu 9.04, it is clear that the users are being forced to be beta-testers.
I am changing distribution due this kind of ‘Microsoft’ mentality.
Which step did I miss? 😉
I followed this tutorial and everything worked except I still have a top “bar” with “File,” “Edit,” “View,” etc in it… If I could get rid of that irritating thing I’d be good to go.
If you don’t plan to use Unity, you can eliminate the thin panel at the top of the Gnome Fallback desktop that says “File Edit View” (etc). To do this, open up the Terminal utility (Menu > Accessories > Terminal) and type this command…
sudo apt-get remove appmenu-gtk3 appmenu-gtk
…followed by pressing the Enter key. Then log out from the desktop and log back in.
I really appreciate your procedure to install and tweek Gnome Classic. It has greatly improved my quality of life. The series of steps was the best explained and easiest to follow such procedure that I have ever used. You must have a very organised mind and excellent instructional skills.
Thanks so much!!!
Just to mention that mint is just a fork of Ubuntu and unity is not that bad at all.But what do i know because i am happy arch user!
I really like this. I have tried a few distros including Mint and I thought this solution was a ‘best in class’. I do have a question however. I want to add new users to my laptop with the same look and feel. Is there a way of cloning the profile i.e. avoid repeating your instructions step by step in another user account. Thanks!
Good question! Not finding anything that answered your question via a google search, I did a quick experiment and came up with a process that seemed to work (although it may need some fine tuning):
Cloning your Gnome 3 Fallback Mode desktop profile to another user:
Open up console (Menu > Accessories > Terminal) and type enter the following list of commands, followed by Enter (you can make a sh script to do them if you wish). Substitute your desired new username for “newuser.”
sudo adduser newuser
sudo mkdir /home/newuser
sudo cp ~/.gnome /home/newuser
sudo cp ~/.gnome2 /home/newuser
sudo cp ~/.gconf /home/newuser
sudo cp ~/.compiz /home/newuser
sudo cp ~/.compiz-1 /home/newuser
sudo cp ~/.config /home/newuser
sudo cp ~/.profile /home/newuser
sudo cp ~/.appdata /home/newuser
sudo chown -R newuser /home/newuser
sudo chgrp -R newuser /home/newuser
…Then, log out and log in as “newuser” selecting “GNOME classic” from the dropdown.
In my test just now, the only obvious thing not cloned was the desktop wallpaper from the original desktop; instead, the desktop was plain blue — but that’s an easy one to do manually.
However, there may be other configuration settings that didn’t get cloned and that I didn’t stumble on: possibly some of the bits that were tweaked using dconf-editor, gconf-editor, and gnome-tweak-tool, as described in the original article above. So please let me know if the list worked for you or if it missed anything.
Excellent!!
worked like charm for me!! no issues at all..
“sudo cp ~/.gnome /home/newuser” …
Better to copy all those files to /etc/skel, where they’ll be used automatically to populate new home directories when subsequently creating a user with “adduser”.
I followed this tutorial and changed everything. It worked perfectly. Thank you very much. It really is the difference between night and day.
Question: I see that 12.04 LTS is available, and is getting good reviews, except that it has Unity. Can I upgrade to 12.04 without losing all the set-up I currently have by following your series of steps? If not, will your series of steps shown here also work after installation of 12.04?
Thanks.
I just installed 12.04 and it looks like most of the changes I’d make in 11.10 carried through ok. One problem is I don’t like the background colors of the bottom bars and alt-right-click doesn’t work to bring up the properties dialog. I’ll keep trying other ways to change the properties.
I had the opposite happen but I think its fixable if I go through this process again. I’m totally new to Linux, the Unity desktop was my first experience and I didn’t like it and then I saw this site that really allowed me o configure my desktop the way I wanted it. I loved it!
Now I’ve upgraded and it took me a few tries of logging on/off to find where I was, but my upper bar is different, my desktops have been unnamed (desktop 1+2, desktop 3+4). My wallpaper totally disappeared (it was the trainyard), but I didn’t have to go through the pain of configuring 2 monitors again.
So a mixed bag but in about 15 minutes or so I think I’ll be close to where I was before.
OK, figured it out but haven’t fixed it yet. All the tweaks I used on this page – still fine. That wasn’t the issue.
I installed a bunch of gnome shell extensions from https://extensions.gnome.org/ and those are disabled or were removed in the upgrade process. So that’s what I need to configure.
I was struggling through several Ubuntu reference books trying to find out how to disable Unity and get back to Gnome. Not having any luck until I came across your website and this page. VERY helpful.
Thanks!
Another solution:
1 – install xfce4 and xfce4-goodies packages.
2 – at Ubuntu logon screen, select the Xfce session.
3 – you will have a Windows XP like interface with all the apps from a standard Ubuntu install.
It is like on Windows 8 you can choose the Metro interface but there is the option to Classic XP interface.
Thanks for that suggestion. Although I haven’t tried xfce4 on Ubuntu, I just installed the packages you listed on my Debian Mint installation, in order to see the current state of the xfce desktop environment.
Although xfce4 seems quite usable, I much prefer Debian Mint’s MATE desktop environment to xfce4. In fact, being a fork of Gnome 2, MATE would be a great alternative to GNOME’s Fallback Mode for those wanting to avoid Ubuntu’s Unity environment.
Details on how to install MATE on Ubuntu are available here.
To simplify the all Ubuntu GUI (Graphic User Interface) without too many software to install or tweaks to do, I suggest to install “Glx-Dock (aka Cairo-Dock)” and you will get a Mac like interface with better control on what apps are open on the dock itself than the Unity launcher.
Just search for Glx-Dock or Cairo-Dock in the Software Center or Synaptic and install it.
Thanks for the post. Installed glx-dock and it works great.
I created a bunch of extensions that attempt to improve the efficiency of the GUI in Shell. Try it out. http://markbokil.com/downloads/extensions/index.html
Good news! The procedure detailed in this post DOES WORK on Ubuntu 12.04. However, there’s one important difference from Ubuntu 11.10…
When using Ubuntu 12.04, to add, move, or delete panel applets, or to access and modify panel properties (size and background), you must press THREE buttons at once — the Alt and Windows menu keys on the keyboard, plus the right mouse button. On the other hand, with Ubuntu 11.10 those functions required pressing TWO buttons: the Alt key on the keyboard, plus the right mouse button.
I finally found the solution: remove the overlay scrollbars. This is the command:
sudo apt-get remove overlay-scrollbar liboverlay-scrollbar-0.2-0
Wish I had found this earlier.
The disastrous Windows 8 style road that both Ubuntu/Unity and Gnome 3 seem to be taking caused me to switch to Debian linux with Xfce desktop. It’s simple, it works, and I’m not going back.