Rooted Kindle Fire screenshot tour
Last updated Apr 15, 2012 — 14690 views This screenshot tour accompanies our article about rooting and tweaking an Amazon Kindle Fire. The tour comprises more than 100 screenshots, which showcase the Kindle Fire’s standard homescreens and settings, the utilities and process we used for rooting and tweaking it, and the overall end result.
Browse the extensive Rooted Kindle Fire screenshot tour using the index below. For the full story behind these screenshots, read our detailed article on Rooting and Tweaking the Kindle Fire.
These screenshots showcase the Kindle Fire’s standard homescreens and settings, the tools and process we used for rooting and tweaking it, and the overall end result. The list below offers quick access to screenshots by category. Click the screenshot thumbnails for larger images.
- Initial setup and homescreens
- Rooting and more with the Kindle Fire Utility
- TWRP and CWMR recovery tools
- Activating Google Services
- Google Android apps
- Some useful system management utilities
- Configuring the new homescreen launcher
- Organizing apps and bookmarks into folders
- Tweaked Kindle Fire homescreens
- A few more apps
- Exploring device settings
Initial setup and homescreens
These screenshots show the normal process of setting up a Kindle Fire for use, and what its default homescreens look like prior to filling it up with apps and content. At this point it’s locked into Amazon’s Android apps market and has the look-and-feel of a bookcase, where apps, books, videos, songs, and documents reside — all represented by fairly large icons…


(click thumbnails to enlarge)
Rooting and more with the Kindle Fire Utility
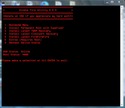
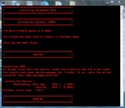
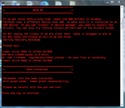
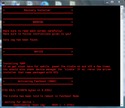
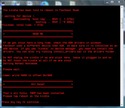
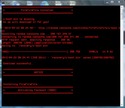
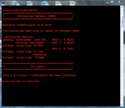
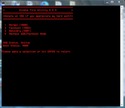
The Kindle Fire Utility makes it relatively easy to install the TWRP (Team Win Recovery Project) replacement bootloader and maintenance utility, root the device, and deploy a core set of Google services and apps. The final screenshot of this set shows the Android Composite ADB Interface driver, which is installed by KFU.

TWRP and CMWR recovery tools
The two sets of screenshots below show the functions provided by the TWRP and CWMR recovery tools, which are installed via KFU…
TWRP:


CWMR:


Activating Google Services
This group of screenshots shows the activation of Google Services on the rooted Kindle Fire. Once the services are deployed and apps are installed from Google’s Android apps market, you can activate syncing of Google’s cloud services to the device using the Google Sync app as shown in the final image of this group…


Google Android apps
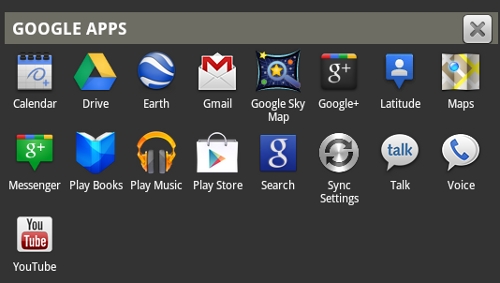
These screenshots show basic operation of Google’s Android apps suite on the Kindle Fire, once they’ve been installed using the Google Android apps market (via the “Google Play” app), and synced to the device via the Google Sync app…
Homescreen Google Apps folder:
Google Mail:


Google Calendar (via aCalendar):


Google Contacts:


Google Maps:


Google Drive (formerly Google Docs):


Google Books:


Google Music:


Google Movies:


Some useful system management utilities
This set of screenshots shows some utilities, obtained from Google’s Android apps market, which are useful for tweaking the device’s homescreens and operation…
Android Task Manager:


DropBox:


ES File Explorer:


Folder Organizer (info):


Hacker’s Keyboard (info) — a powerful alternative to the standard Kindle Fire keyboard; once installed, you can easily select either keyboard (refer to the full article for installation notes)…


Installing a replacement homescreen launcher
Next we replace the Kindle Fire’s bookshelf-style homescreen launcher with Go Launcher EX, a more typical Android launcher. Not shown, is the process of substituting a custom homescreen background (to be discussed in the review)…


Organizing apps and bookmarks into folders
Now, we use Folder Organizer to place apps and folders containing apps and bookmarks on the Kindle Fire’s homescreens. These screenshots show the resulting folders, following the installation of lots more apps…


Tweaked Kindle Fire homescreens
![]() And here’s the finished set of homescreens. The first three screenshots show three views of the main homescreen, which appears whenever you press the home icon. The second three show the alternate screens that are accessed via the “app drawer” icon (pictured at the right), which is located on the lower- or upper-right corner of the main homescreen (depending on whether it’s in portrait or landscape mode)…
And here’s the finished set of homescreens. The first three screenshots show three views of the main homescreen, which appears whenever you press the home icon. The second three show the alternate screens that are accessed via the “app drawer” icon (pictured at the right), which is located on the lower- or upper-right corner of the main homescreen (depending on whether it’s in portrait or landscape mode)…


A few more apps
Here, we showcase a handful of the more-than-150 apps that now reside on our souped-up Kindle Fire…
LogMeIn remote desktop access (info):


Office Suite Pro (info):


B&N Nook books:


Pandora:


Weather.com:


YouTube:

Exploring device settings
These screenshots show various other system settings functions. The system status screens reflect the condition of the device following the installation of about 150 apps from both the Amazon and Google Android apps markets…


For the full story behind these screenshots, read our detailed article on Rooting and Tweaking the Kindle Fire.


I downloaded and installed Hacker’s Keyboard from the market, but it is not coming up on my input methods. Am I missing something?
Thanks.
In any text entry field if you long-press the screen you should get a pop-up message with several options. One of the options should be “Input method.” Tap that option and you should see the list of available input methods. Select Hacker’s Keyboard and you’re in. Later, to switch back do the same thing.
KF, rooted successfully, all apps in KFU installed.
I see you have Google Earth as well, plus a few others which Google refuses to install
on KF.
Why?
I am stuck at activating fastboot 4002 and it will not go further. I turned it on and off.
Help!!!
Thanks : )
My daughters kindle fire is showing blocks of coloured lines down left hand side
And kindle fire written in top and bottom right corners
A hold of power button for over a min many times just brings up the same screen
It is not recognised in devices via USB
Any advice or is it dead it chargers via USB and mains plug
At a loss it’s a first gen us version we are in uk so can’t really return
Please help
Thankyou in advance
I have a kindle Fire with Cyanogenmod 9 installed since September 2012. I am very happy with the mod, but I have one question: How can I set the default programs so they stay defaulted? As an example, I want to use Dolphin browser, but it will not stay as default. Any suggestions would be appreciated.
Thanks.
Bob
I just put Cyanogenmod10 on my mom’s Kindle Fire. The only problem I had was trying to figure out how to flash the ROM to the Kindle Fire. It is working perfectly and is going to be much easier for my mom to use. I have never done anything like this before and the information was very helpful in walking me through everything, I just did not like the Go Launcher and wanted something else.